
How to Design a Science Laboratory for Schools: 7 Key Considerations
By Arena Consultants · March 1, 2026 · 8 min read
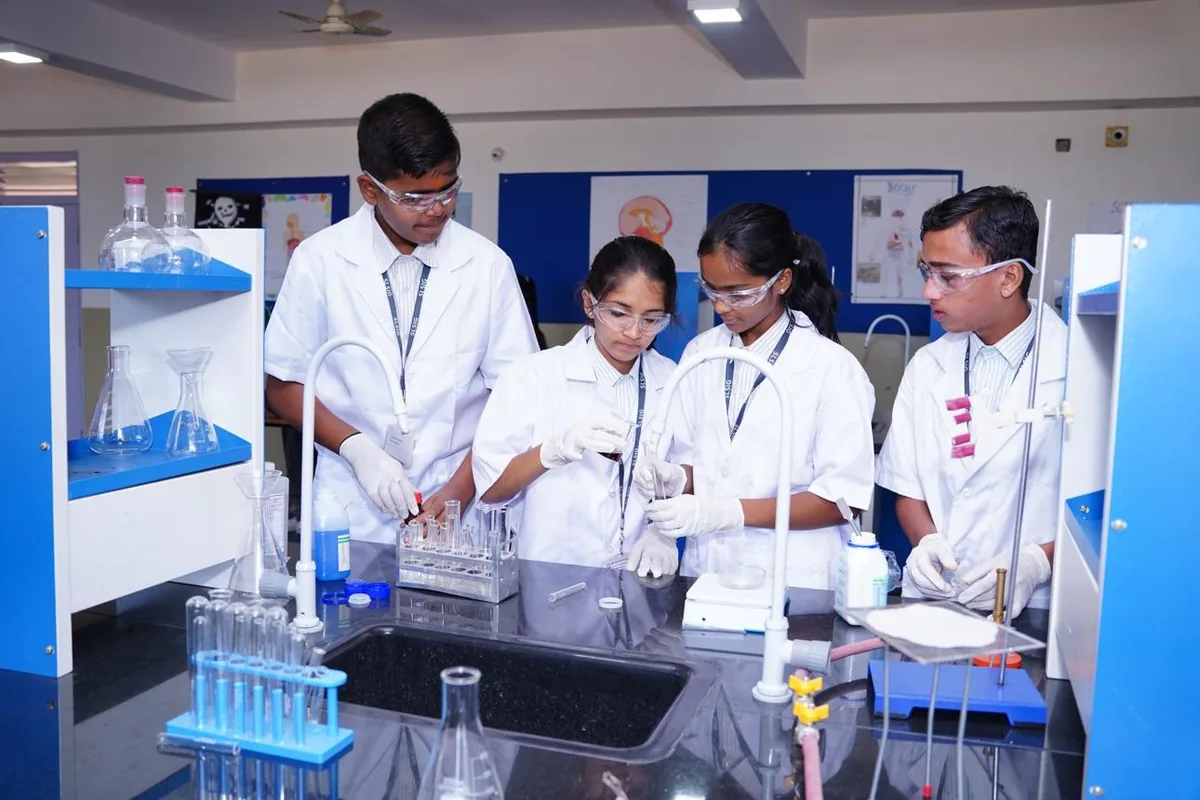
Curiosity peaks in childhood. Ask a class of twelve-year-olds why the sky is blue or why ice floats and you will get a dozen theories in a minute. The school science lab is where those theories get tested for the first time.
It is also one of the most demanding rooms in any school building. It holds chemicals, gas, water, heat and glassware, and it fills up with thirty or forty students who are still learning how to handle them. Get the design right and the lab becomes the room students remember. Get it wrong and it becomes a space teachers avoid using for anything more than a demonstration.
We have spent over two decades designing laboratories for industry and academic institutions. Many of the same principles apply in schools, but some things change completely. This guide covers both.
What makes a school lab different?
An industrial or research lab is designed around trained professionals. A school lab is designed around learners. That single difference changes almost every decision:
| Industrial / research lab | School lab | |
|---|---|---|
| Users | Trained scientists and technicians | Students aged roughly 11 to 18, with a teacher |
| Main activity | Research, testing, production support | Teaching, demonstration and guided practicals |
| Group size | A few people per module | 30 to 40 students at once |
| Biggest design driver | Process, compliance, throughput | Supervision, safety and flexibility |
| Who controls hazards | Each trained user | Largely the teacher and the layout itself |
Sound familiar?
- Practicals keep getting swapped for textbook demonstrations.
- The teacher cannot see every bench from the front of the room.
- Chemicals live in a cupboard inside the lab because there is nowhere else for them.
If any of these ring true, the lab design is limiting how science gets taught.
Start with the rules: CBSE lab requirements
For schools seeking or renewing CBSE affiliation, lab design starts with the board's infrastructure norms. Under Clause 4.2 of the Affiliation Bye-Laws, a school needs a composite science lab at the secondary stage and separate physics, chemistry and biology labs at the senior secondary stage, each at least 9 m x 6 m.
| Facility | CBSE minimum requirement |
|---|---|
| Science lab, secondary stage | One composite science lab, minimum 9 m x 6 m (about 600 sq ft) |
| Science labs, senior secondary stage | Separate physics, chemistry and biology labs, each minimum 9 m x 6 m |
| Computer lab | Minimum 9 m x 6 m |
| Mathematics lab | At least the size of a regular classroom |
Two things are worth keeping in mind. First, these are minimums, not targets. A 9 m x 6 m room holding a full section of students, benches, services and safety equipment is tight, and it does not include space for a prep room or chemical store. Second, CBSE updates its bye-laws periodically, and ICSE and state boards have their own norms, so always check the current requirements for your board before finalising a design.
Ask this: Are we designing to the minimum that gets us affiliated, or to what our students and teachers actually need for the next fifteen years?
1. Build safety into the layout, not around it
Safety in a school lab is not a list of equipment added at the end. It is the result of where things are placed from day one. The essentials include:
- Chemical-resistant work surfaces that handle spills, heat and daily cleaning.
- Anti-slip, chemical-resistant flooring with no trip hazards from cables or floor fixtures.
- Two clear exits with circulation routes that are never blocked by benches or stored equipment.
- A master gas and power shut-off within easy reach of the teacher, so one action can make the room safe.
- An eyewash station and safety shower close to the exit and reachable within seconds from any bench.
- Fume cupboards in the chemistry lab for any experiment that releases vapours, plus good general ventilation throughout.
- Fire extinguisher, fire blanket and first aid kit in visible, clearly signed positions.
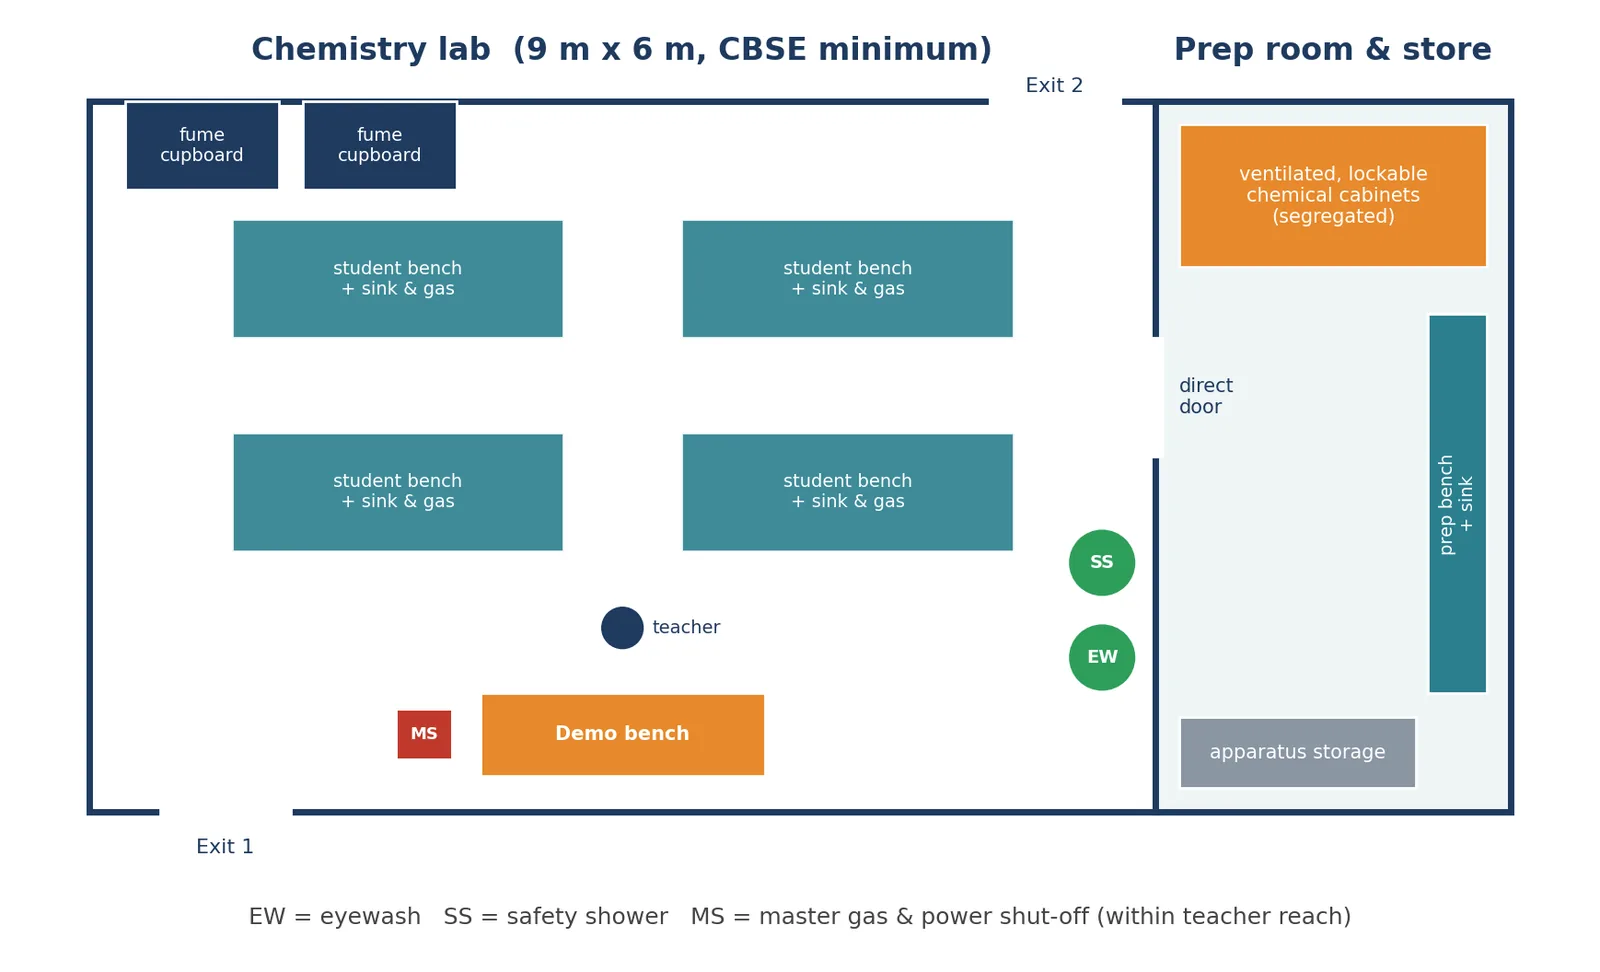
Try this: Stand at the teacher's demo bench and time how long it takes to reach the gas shut-off, the eyewash and the nearest exit. If any of them takes more than a few seconds, the layout needs work.
2. Design for teacher sightlines
In a school lab, the teacher is the main safety system. Several groups will be working at once, often with flames or chemicals, and the teacher needs to see every one of them without walking around obstacles. Tall storage units, equipment racks and badly placed benches all create blind spots.
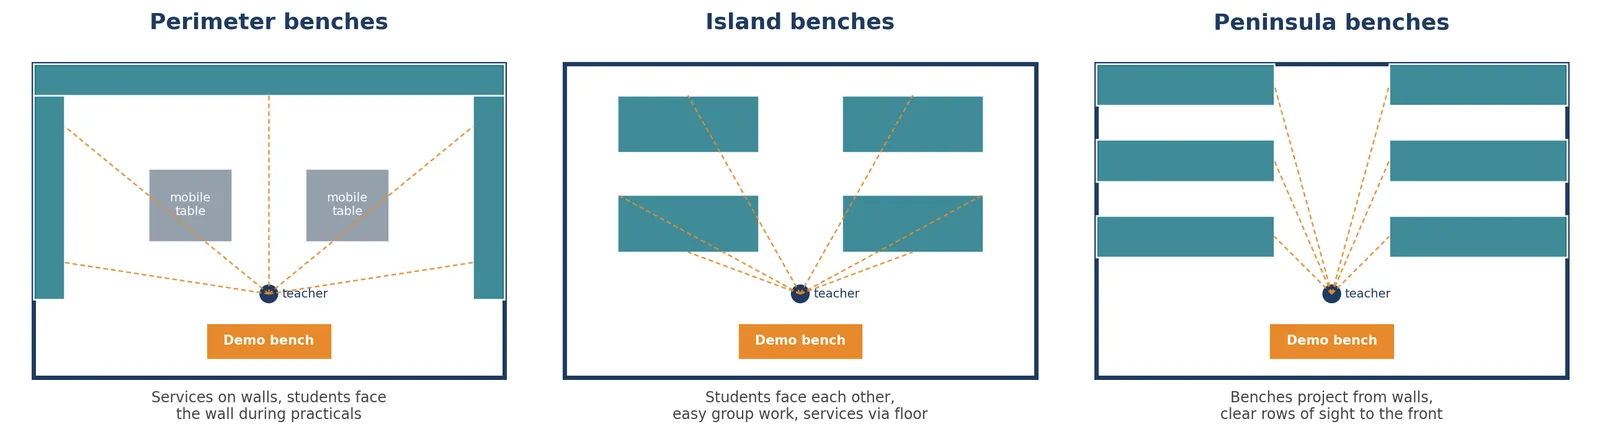
The bench layout is the single biggest factor here. The three most common options each have trade-offs:
| Layout | Works well for | Watch out for |
|---|---|---|
| Perimeter | Flexible centre space with mobile tables; easy service runs along walls | Students face the wall during practicals, so the teacher sees backs, not hands |
| Island | Group work and discussion; students face each other | Services must run through the floor; some students sit with their backs to the teacher |
| Peninsula | Clear lines of sight to the front; services fed from the walls | Less flexible for whole-class rearrangement |
There is no single right answer. A chemistry lab with heavy service needs often suits island or peninsula benches, while a physics lab that needs open floor space may suit a perimeter layout with mobile tables in the centre.
3. Give each subject the lab it actually needs
At senior secondary level, physics, chemistry and biology get their own rooms, and they should not be designed as three copies of the same lab. Each subject places different demands on the space:
| Subject | Key design needs |
|---|---|
| Chemistry | Fume cupboards, gas outlets, sinks at every bench, chemical-resistant surfaces, strong ventilation and the closest link to the chemical store |
| Physics | More power outlets, sturdy benches for apparatus, a room that can be darkened for optics experiments, and open floor space for motion experiments |
| Biology | Sinks and washing areas, microscope storage, good natural light, specimen and model storage, and easy-clean surfaces |
| Composite (secondary) | A balance of all three, with gas and sinks, enough power, and storage that keeps each subject's apparatus organised |
4. Plan the prep room and chemical store
The prep room is the backbone of a safe school lab, and it is the space most often left out of the plan. It is where teachers and lab assistants prepare solutions, set up apparatus, store chemicals and clean up after practicals, away from students.
A good prep room:
- Connects directly to the lab through its own door, so materials never travel through corridors full of students.
- Stores chemicals in ventilated, lockable cabinets, with incompatible chemicals kept apart (acids away from bases, flammables in their own cabinet).
- Has its own sink and prep bench so preparation does not happen on student benches.
- Keeps hazardous materials out of the lab itself, so nothing dangerous sits within reach of students between lessons.
In a chemistry lab, lockable chemical storage is not optional. It is a basic requirement.
5. Keep the lab flexible
The same lab might host a whole-class demonstration on Monday, group practicals on Tuesday and a science fair project on Friday. The design should support all of these without a weekend of furniture moving.
The trick is to separate what must be fixed from what can move. Services such as gas, water and drainage need fixed points. Everything else can be flexible: mobile tables, modular storage, and wheeled trolleys that let teachers reshape the room around the lesson.
Plan technology the same way. Interactive displays, data-logging sensors, digital microscopes and laptops all need power and data points in the right places. Running these through bench-mounted or ceiling-fed outlets keeps cables off the floor and out of the way of water and chemicals.
6. Design for every student
Every student should be able to take part in practical work, not just watch it. Inclusive lab design means:
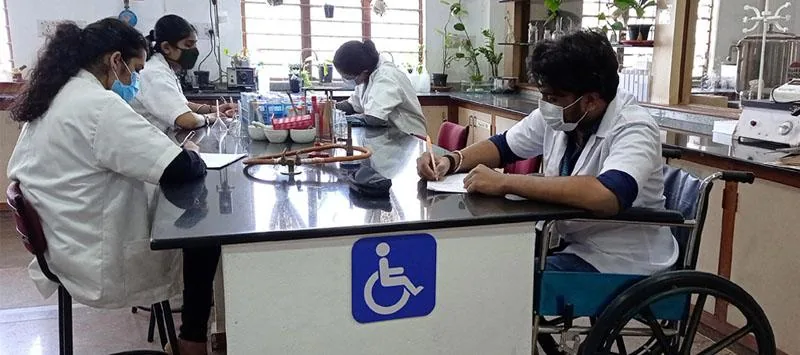
- At least one height-adjustable or wheelchair-accessible workstation, with an accessible sink and controls.
- Wide, clear circulation routes between benches so wheelchairs and crutches can move freely, and so the room can be evacuated quickly.
- Equipment, shelves and controls placed within comfortable reach for younger and shorter students.
- Seating that suits standing-height benches, with stable stools rather than chairs that can tip.
Designing for accessibility from the start costs far less than retrofitting later, and it makes the lab more comfortable for everyone.
7. Make it a place that sparks curiosity
Once the lab is safe, compliant and practical, the final layer is how it feels. Good natural light, balanced with even artificial lighting, makes it easier to read instructions and observe results. A neutral base with a few considered accent colours can make the lab feel energetic without becoming distracting. We cover this in more depth in our post on why lab users need vibrant laboratory spaces.
Then make the walls work. Periodic tables, displays of student projects, models and live experiments on show all tell students that this room is for discovery. Every element should earn its place: a lab full of decoration is just as distracting as a lab with nothing at all.
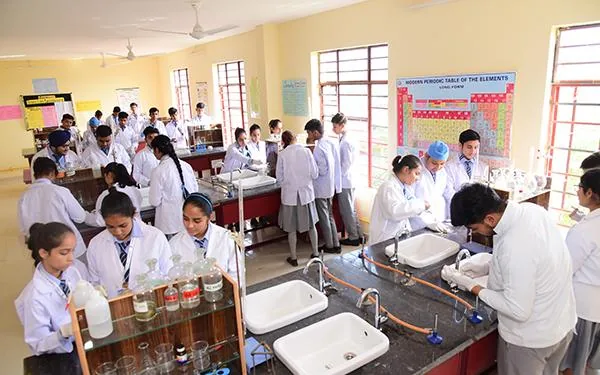
Designing a lab for learning
A great school lab is not the one that fits the most equipment into 600 square feet. It is the one where a teacher can run a practical with forty students and feel in control, and where students leave having done science rather than watched it.
That comes from treating the lab as a specialised space from the very first sketch: getting the size and services right, planning for supervision, separating the prep room, and only then layering on the details that make the room inspiring.